Opencart 360° and 3D Product Tours Installation And Operating Manual

Introduction:
Q: Tired of flat images that don’t do justice to your amazing products?
Q: Want to give your customers a 3D product tour without ever leaving their screen?
Say hello to the OpenCart 360° and 3D Product Tours module! This powerful extension allows you to present your products in fully interactive 360° and 3D views, offering your shoppers a chance to rotate, zoom, and explore every detail before making a purchase.
It’s not just about making your store look modern, but it’s actually about building trust, boosting engagement, and reducing returns by giving customers a complete, hands-on look at what they’re buying.
Whether you’re selling electronics, home decor, fashion items, or any other visually rich product, this module adds a cutting-edge touch that enhances both user experience and sales performance.
Features: Opencart 360° and 3D Product Tours
- Adds interactive 3D product visualization
- Supports GLB and GLTF file formats
- Enables a 360° product viewing experience
- Simple admin panel, product tour management
- Easy module installation and configuration
- Allows tour status updates for products
- User-friendly interface for admins and customers
- Grant user group access and modify rights
- Add, edit, or delete product tours easily
Note:Ensure your OpenCart version supports this module before installation.
Installation: Opencart 360° and 3D Product Tours
Steps to Install the Module
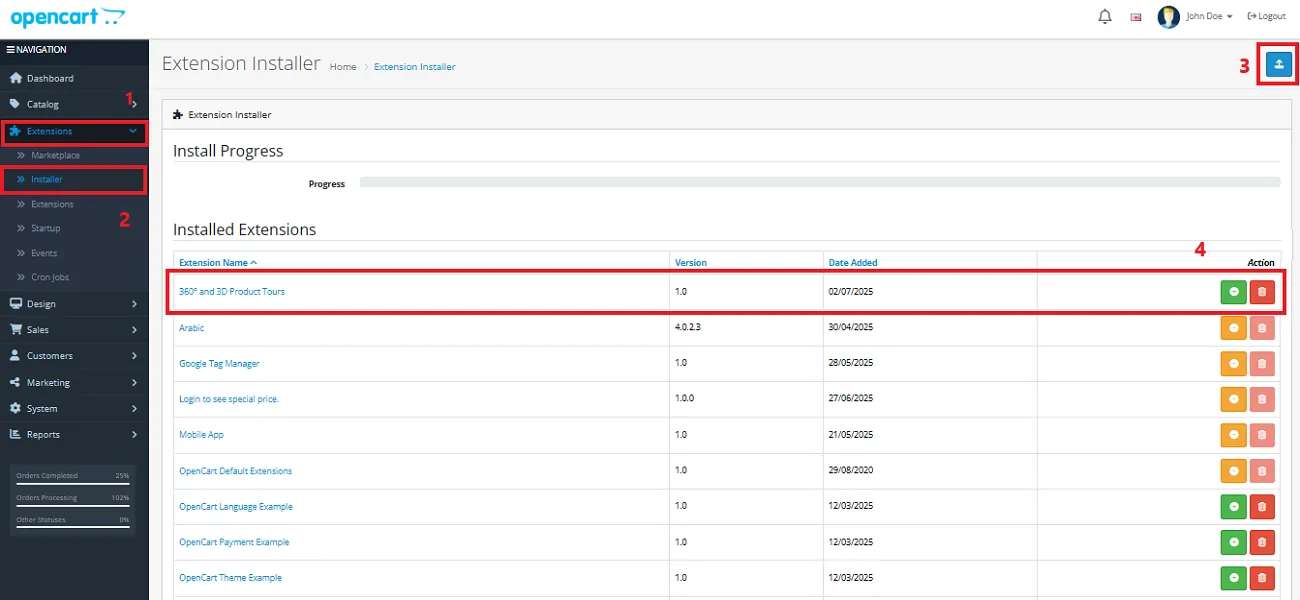
OpenCart’s Admin panel >> Extension >> Installer
- Access Extensions in Admin Panel: Log in to OpenCart’s Admin Panel, navigate to the ‘Extensions’ menu, and select ‘Installer’ from the dropdown.
- Upload the File: On the Installer page, click the file upload icon in the top-right corner. Ensure the file you want to upload is saved on your system with the extension ‘.ocmod.zip’.
- Install the Module: Once the file is uploaded, the module name will appear in the list. Click the green button next to it to complete the installation process.
Permission: Opencart 360° and 3D Product Tours
Now, grant the store administrators permission to edit the module.
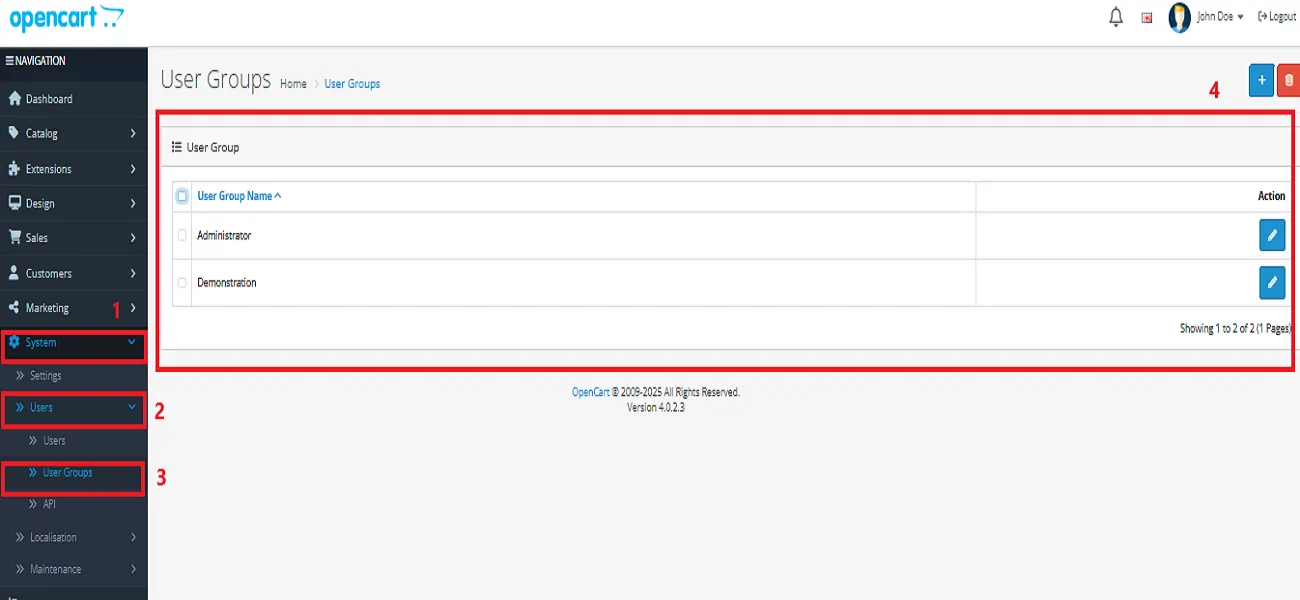
OpenCart’s Admin panel >> System >> User >> User Groups >> Edit Administrator
- Go to OpenCart’s Admin Panel and click on ‘System’ to see the drop-down list.
- Then click on ‘Users’.
- A drop-down list will appear when you click on ‘Users.’ From the list, click on ‘User Groups.’
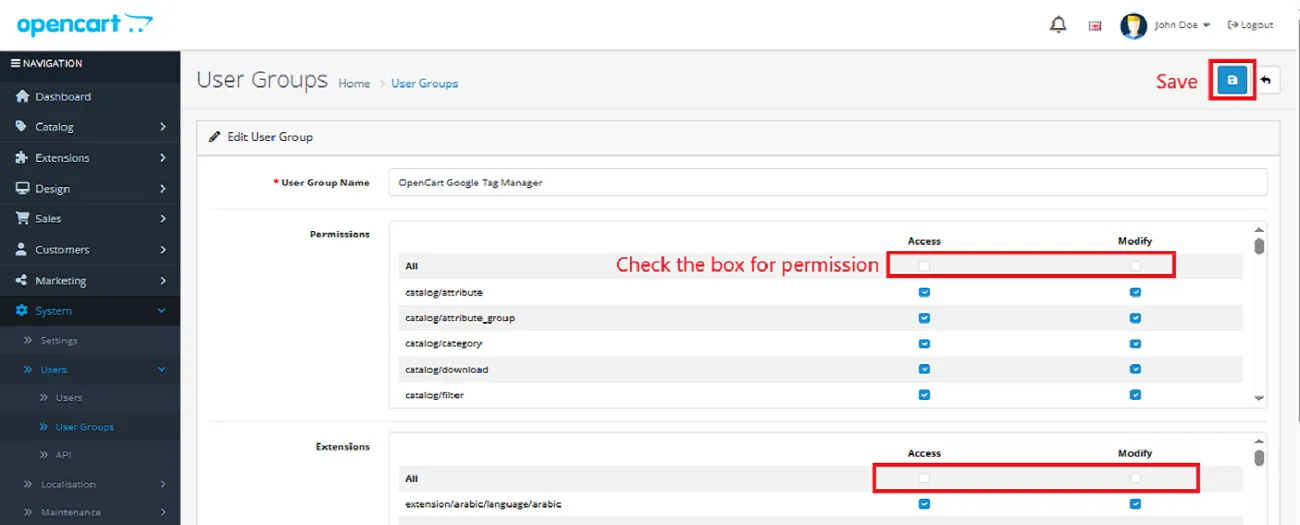
- Edit Administrator will allow permission for the user.
- Set access and modify permissions for all related modules.
Configuration: Opencart 360° and 3D Product Tours
OpenCart’s Admin panel >> Extensions >> Extensions >> Choose The Extension Type >> Modules >> Opencart 360° and 3D Product Tours >> Install and edit.
- Go to OpenCart’s Admin Panel and click on ‘Extensions’ to see the drop-down list.
- Again, click on ‘Extensions’ from the drop-down list.
- Choose your extension type.
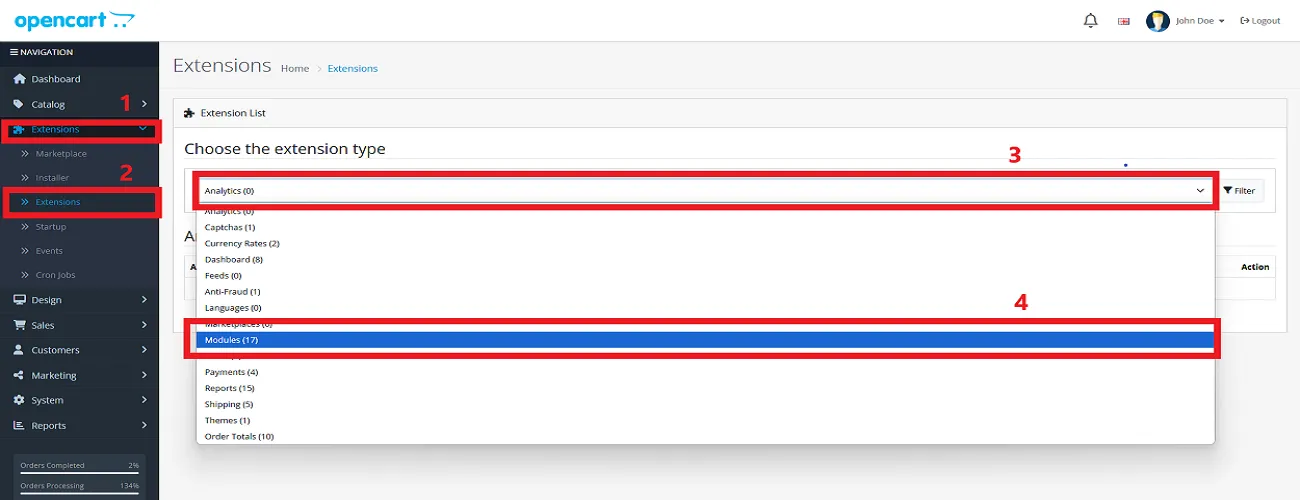
- Click on the green button and install the module.
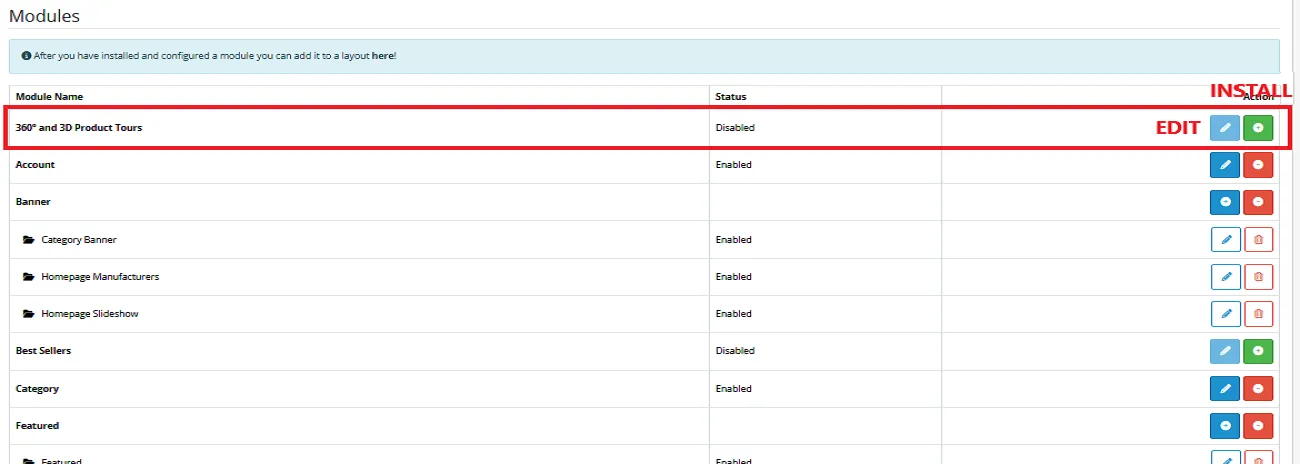
- Click the edit button, set the status to ‘Enable’, and save.
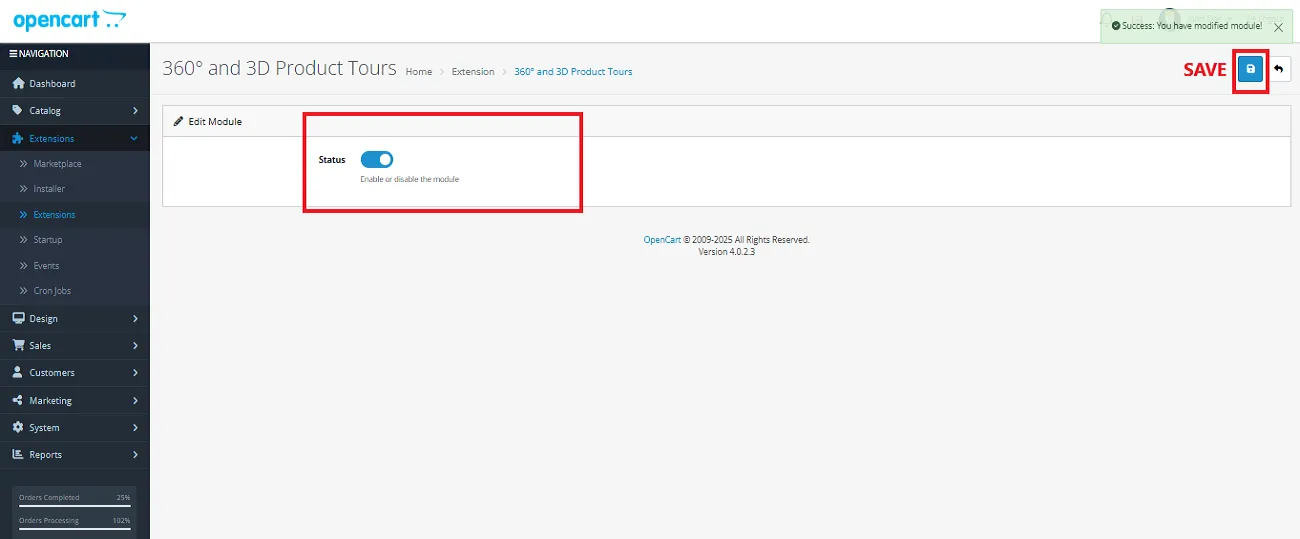
Finally, the module installation, permission, and configuration are completed with this step.
Admin Interface
Once the configuration is complete, a new section titled “Product Tours” will appear on the left-hand side of your OpenCart store dashboard.
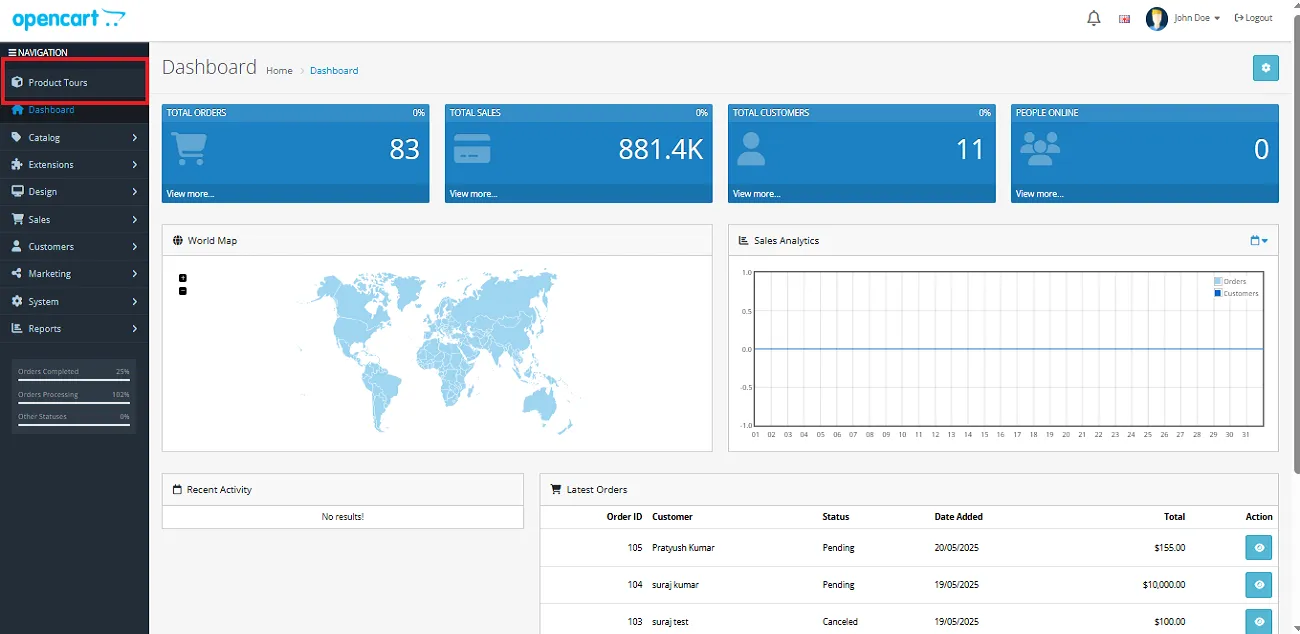
Clicking on the Product Tours section will take you to the editing panel, where you can input all the necessary details to showcase your products in an interactive 3D and 360° view.
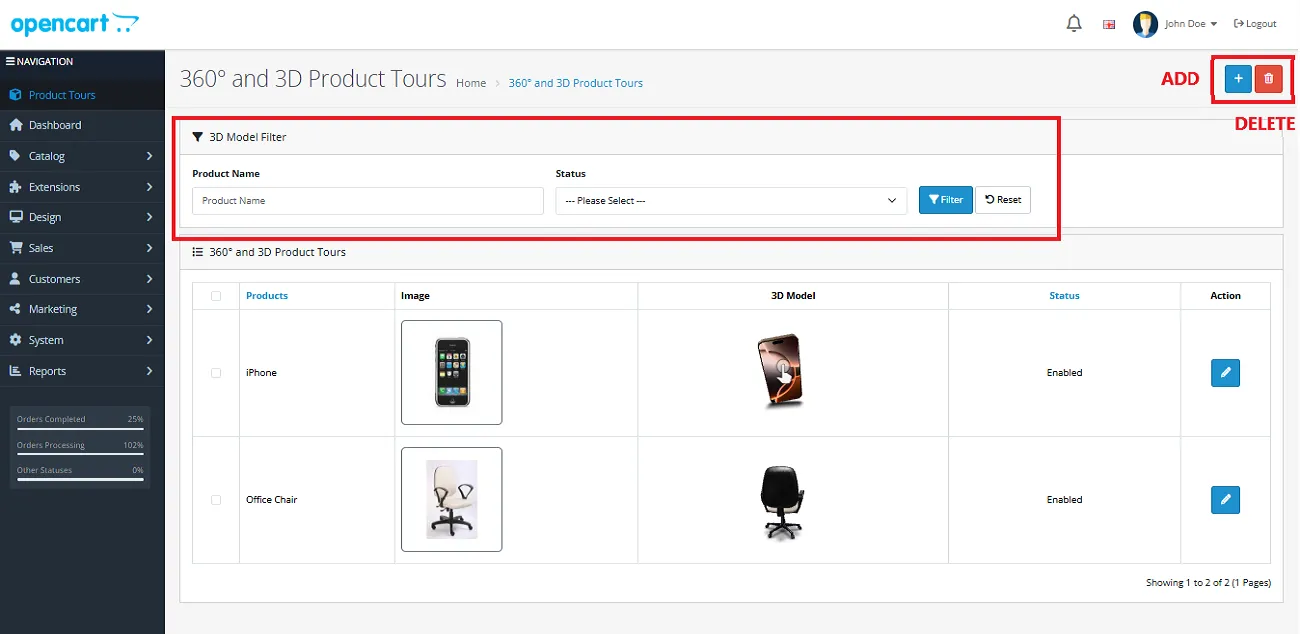
Within this panel, you can:
- Select previously added products and update their tour status.
- Use the button in the top-right corner to add a new product or model.
- Delete any product by selecting it from the list displayed below.
Note: Every new product you add will appear in the section at the bottom of the screen. For example, you can now see our added product, the iPhone, listed there.
When adding a new product, you’ll encounter three key fields: Product Name, 3D Model File, and Status. Please ensure each field is filled out appropriately and save it before moving forward.

Note: Always upload the 3D model in GLB or GLTF format.
Customer Interface
Potential customers visiting your store will have the option to view the 3D model displayed above the Add to Cart section.
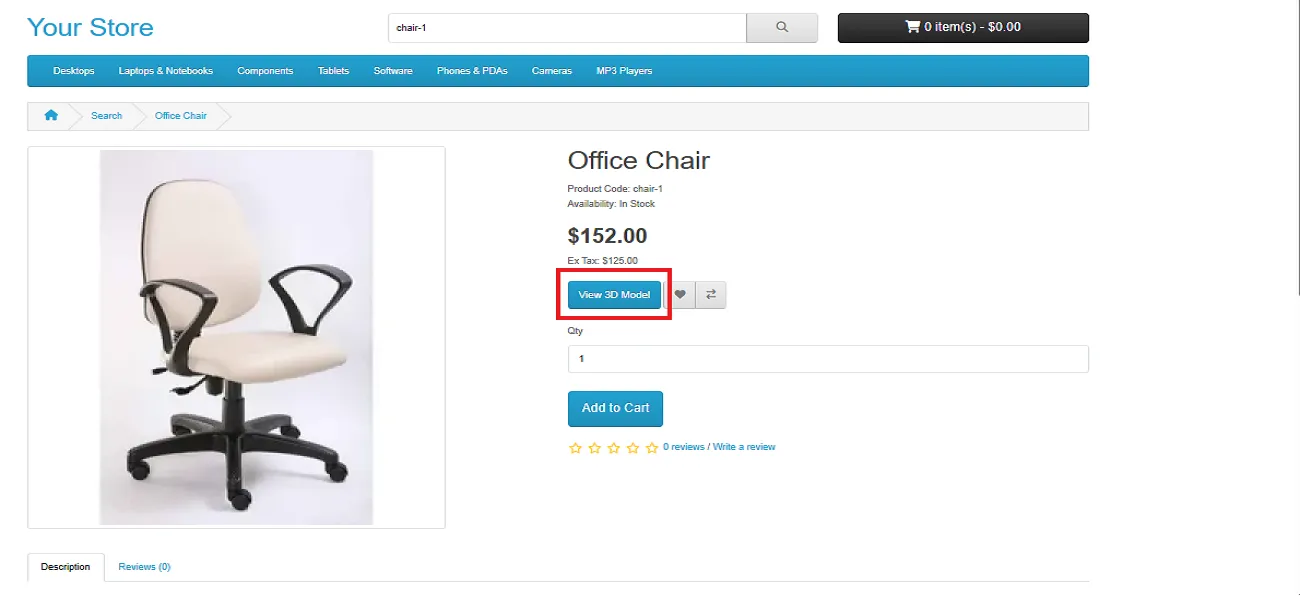
By clicking the View 3D Model button, customers will be able to see the product in the format shown below:
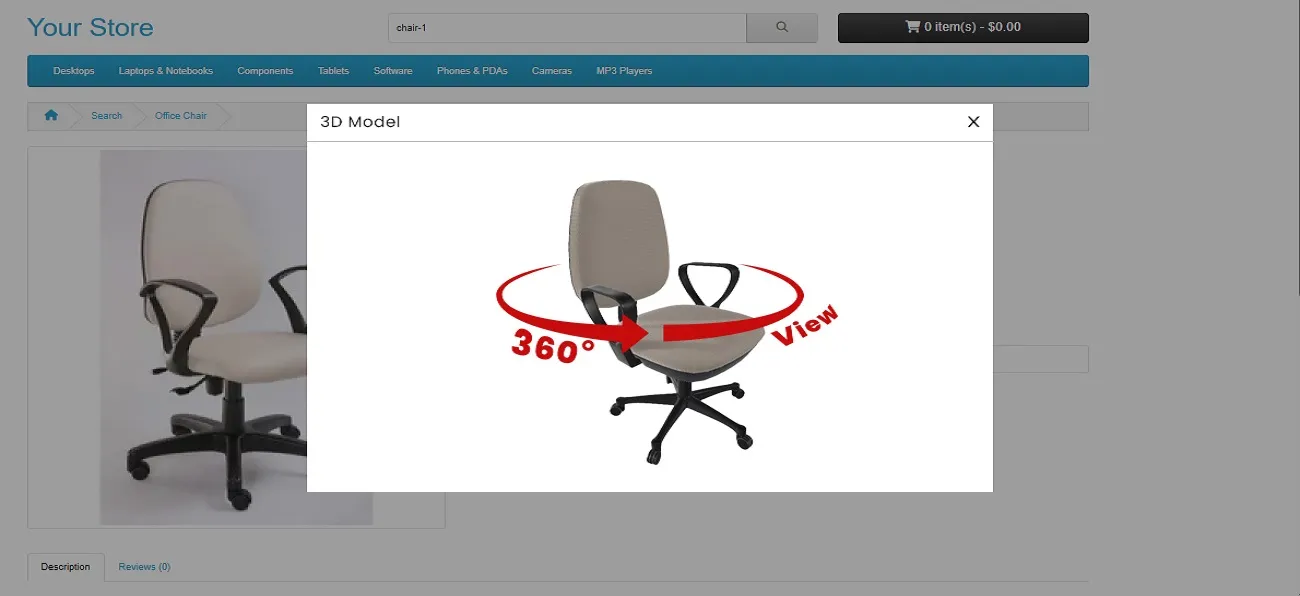
Adding this extension will transform your product pages into dynamic visual experiences with just a few simple steps!